OPC UA Server
The OPC UA Server page is where you manage the server model itself:
- the address space
- imported OPC UA models
- instances in the server
- certificates
- server settings
It is important to separate this from the Reniway OPC UA Server connector:
- the OPC UA Server page manages the server model and its nodes
- the Reniway OPC UA Server connector manages the properties that map live data from connectors and data mappers into that server model
If you want to publish live machine data into the OPC UA server, configure the mapping through the Reniway OPC UA Server connector.
What the server supports
The server can be used as a real modeling and integration layer.
It supports:
- importing
NodeSet2XML files - loading standard OPC UA information models such as Machinery or Umati
- creating instances from imported object types
- writing values directly to variables in the node browser
- updating variable datatypes
- switching variables between scalar, arrays, and other value rank forms
- structured datatypes
This means you can import an OPC UA data model, create your machines or objects as instances, and then map live values from Reniway into those instances.
Address Space
The Address Space tab is the main node browser for the server.
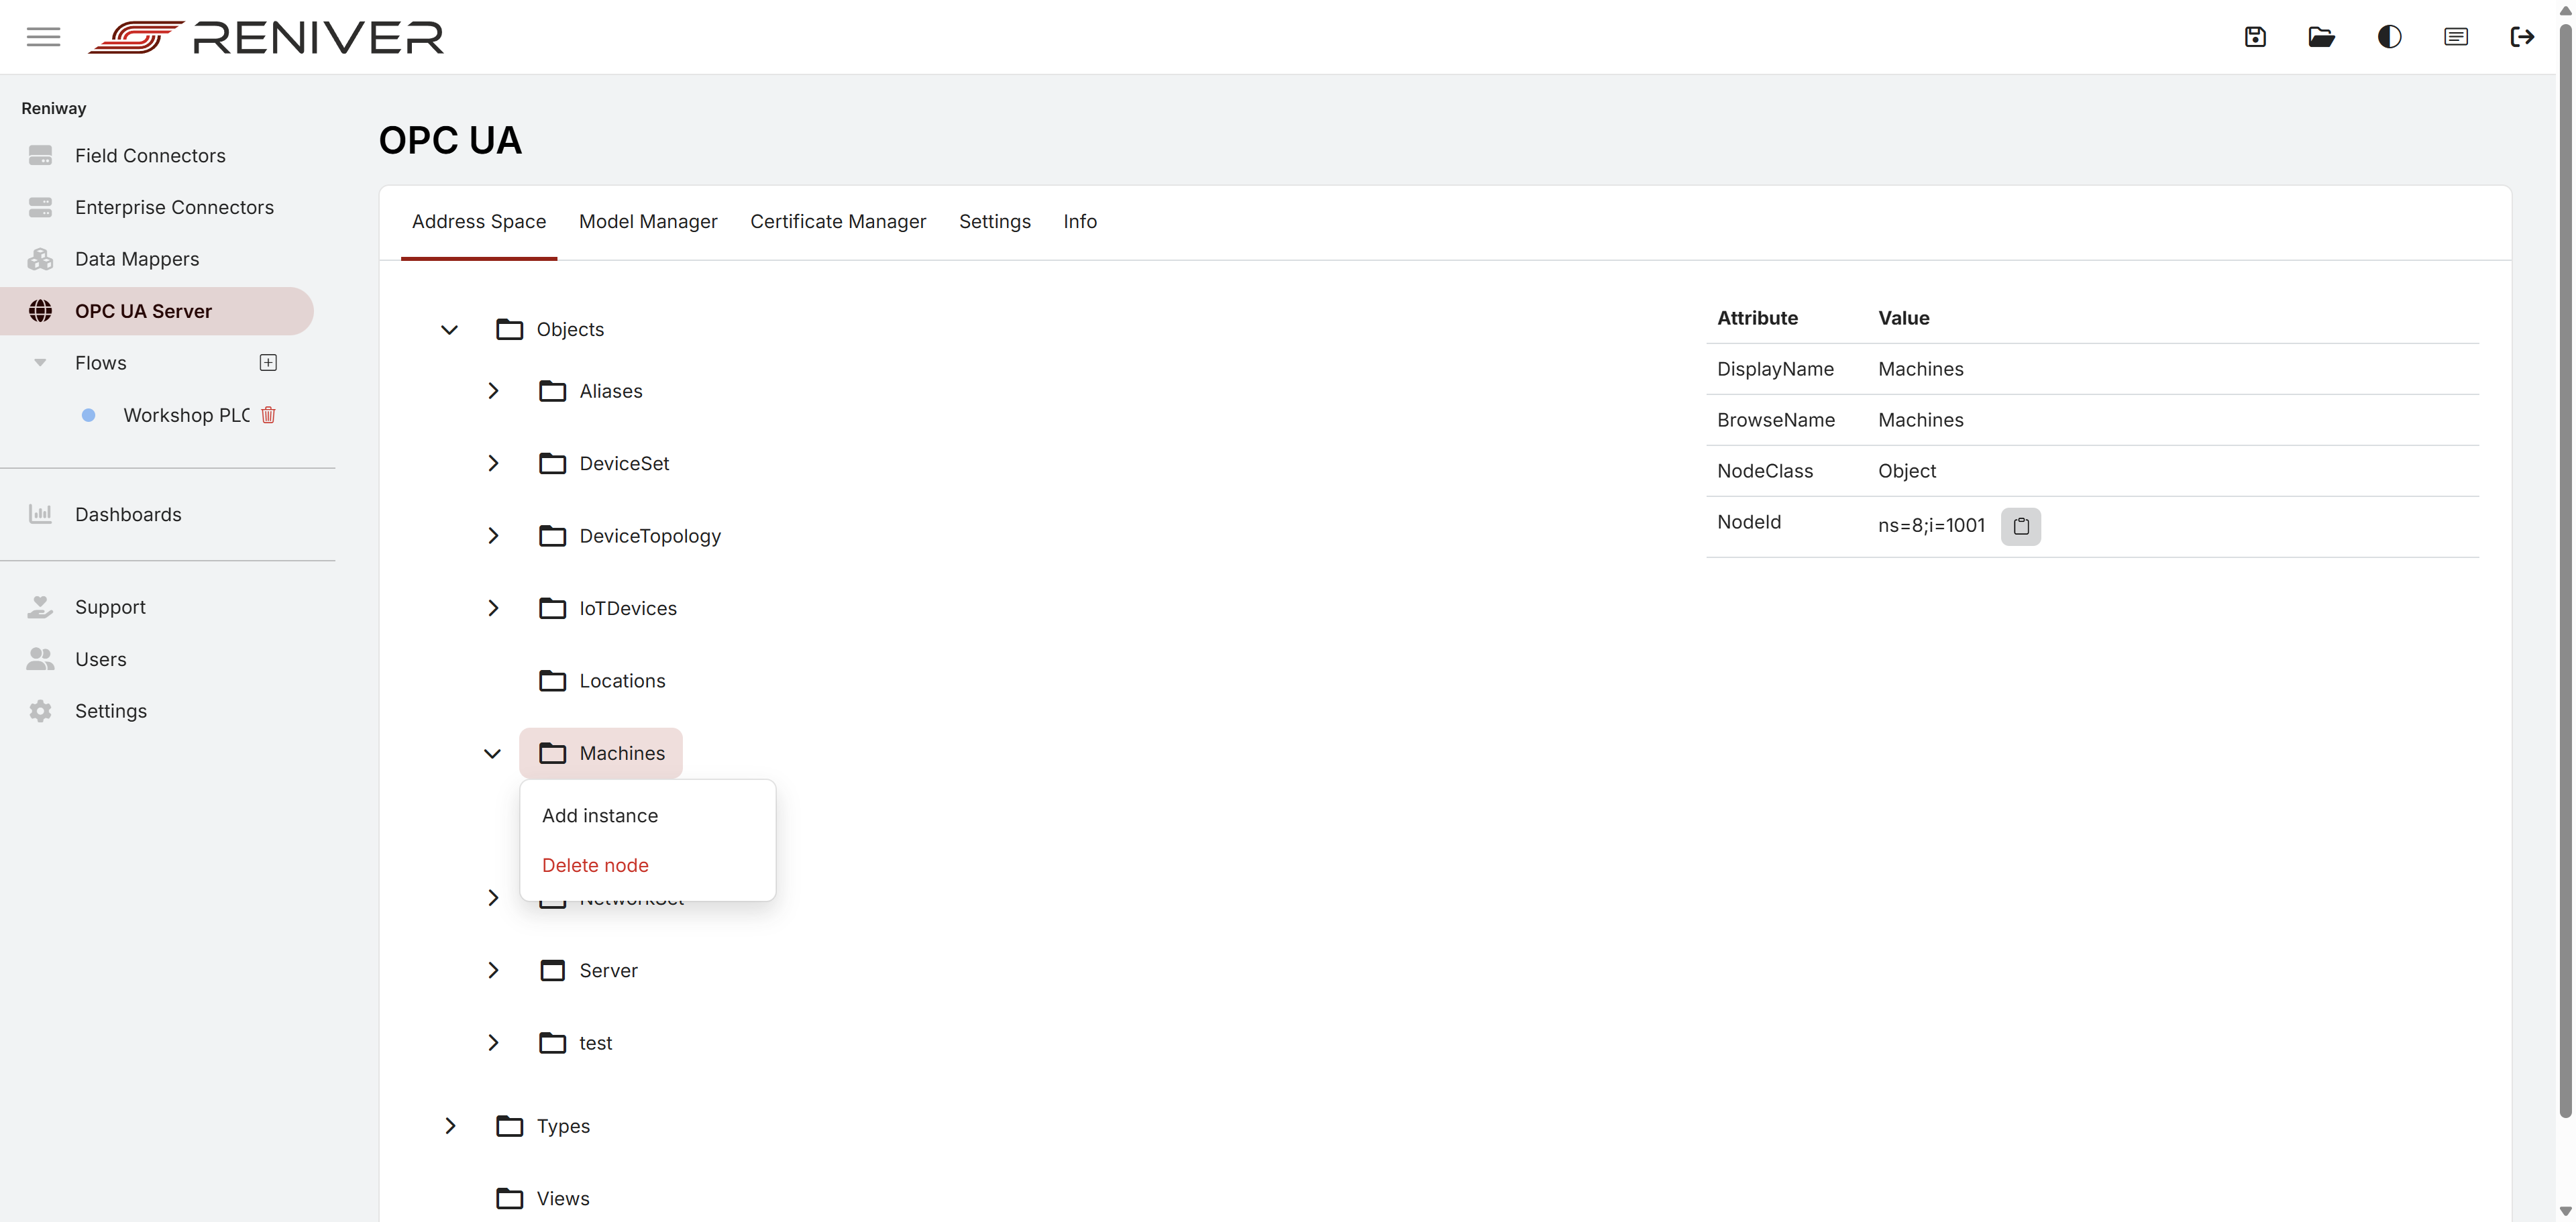
From here you can:
- browse the current server nodes
- inspect node attributes
- right-click types or folders to create instances
- select variables and edit their values
- update datatype and value-rank related settings
Model Manager
The Model Manager tab is where you load OPC UA information models as NodeSet2 XML files.
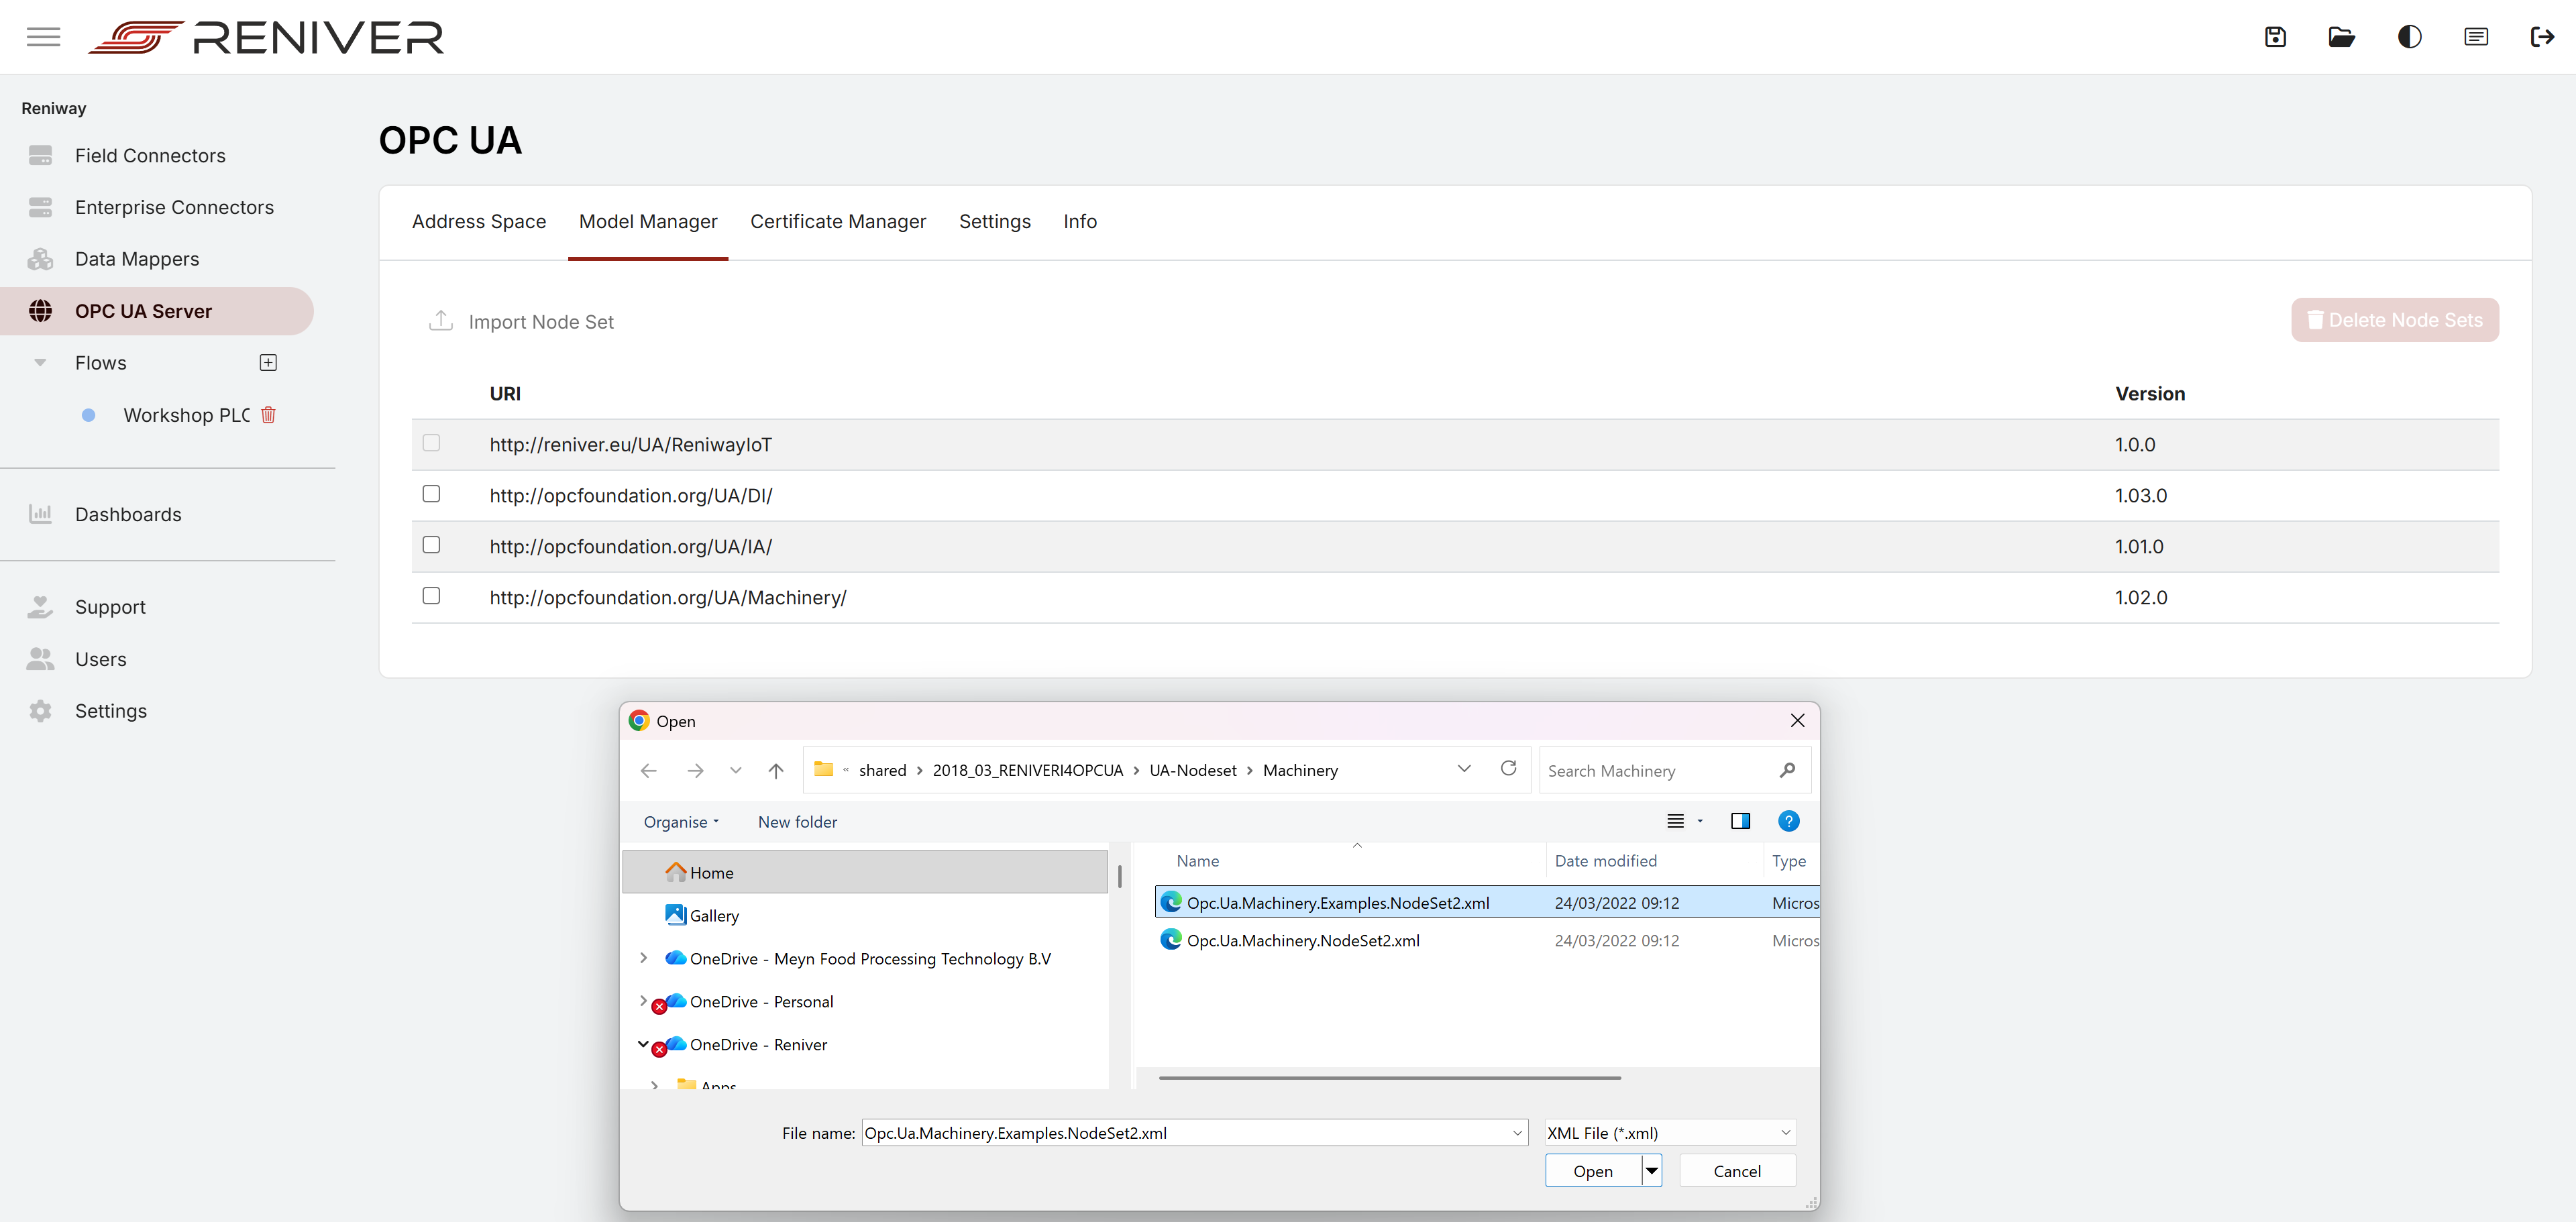
When importing a model, you select the NodeSet2 XML file from disk.
This is the starting point when you want to work with standard models such as:
- OPC UA Machinery
- Umati-related models
- custom OPC UA companion specifications
After import, the types become available in the node browser and can be instantiated into the live server address space.
Complete Example: Import Machinery and Create an Instance
One practical workflow is:
- Open
OPC UA Server > Model Manager - Import a Machinery
NodeSet2XML file - Go back to
Address Space - Browse to the location where the imported type should be instantiated
- Right-click the parent node and choose
Add instance - Enter the instance name and select the imported type definition
- Confirm the reference type and create the instance
In the node browser, the context menu exposes the Add instance action:
The add instance dialog then lets you choose the imported type and create the concrete instance:
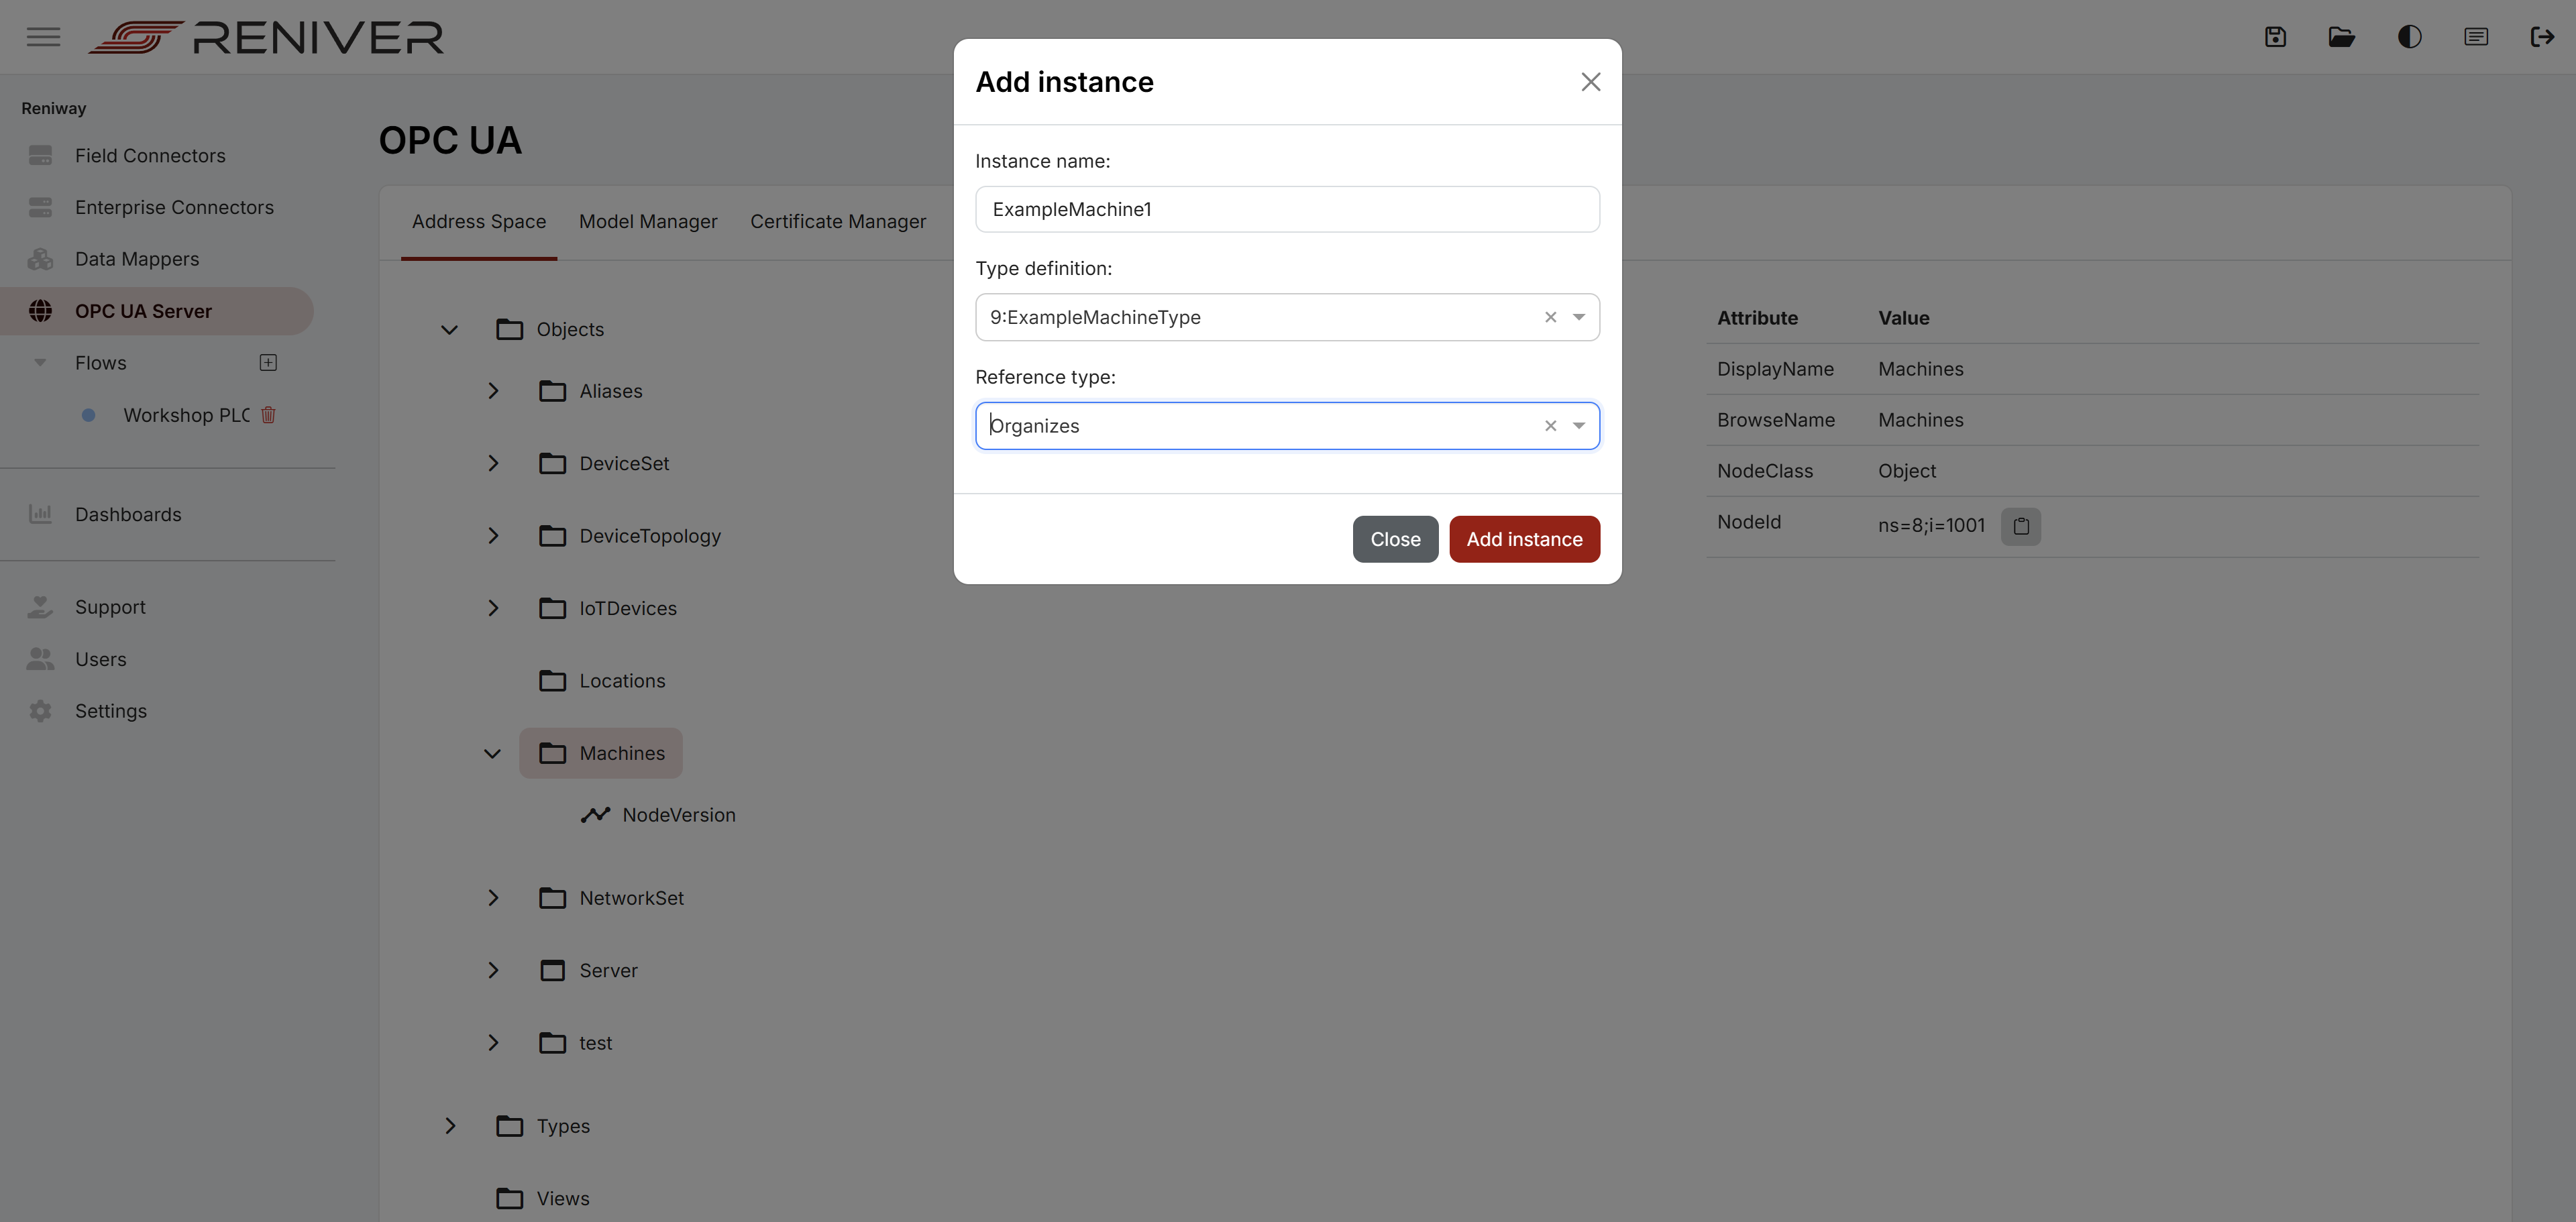
For example, after importing Machinery types, you can create an ExampleMachine1 instance and build out the machine structure inside the server.
Editing Variables in the Node Browser
Once an instance exists, you can select variables in the node browser and manage them directly.
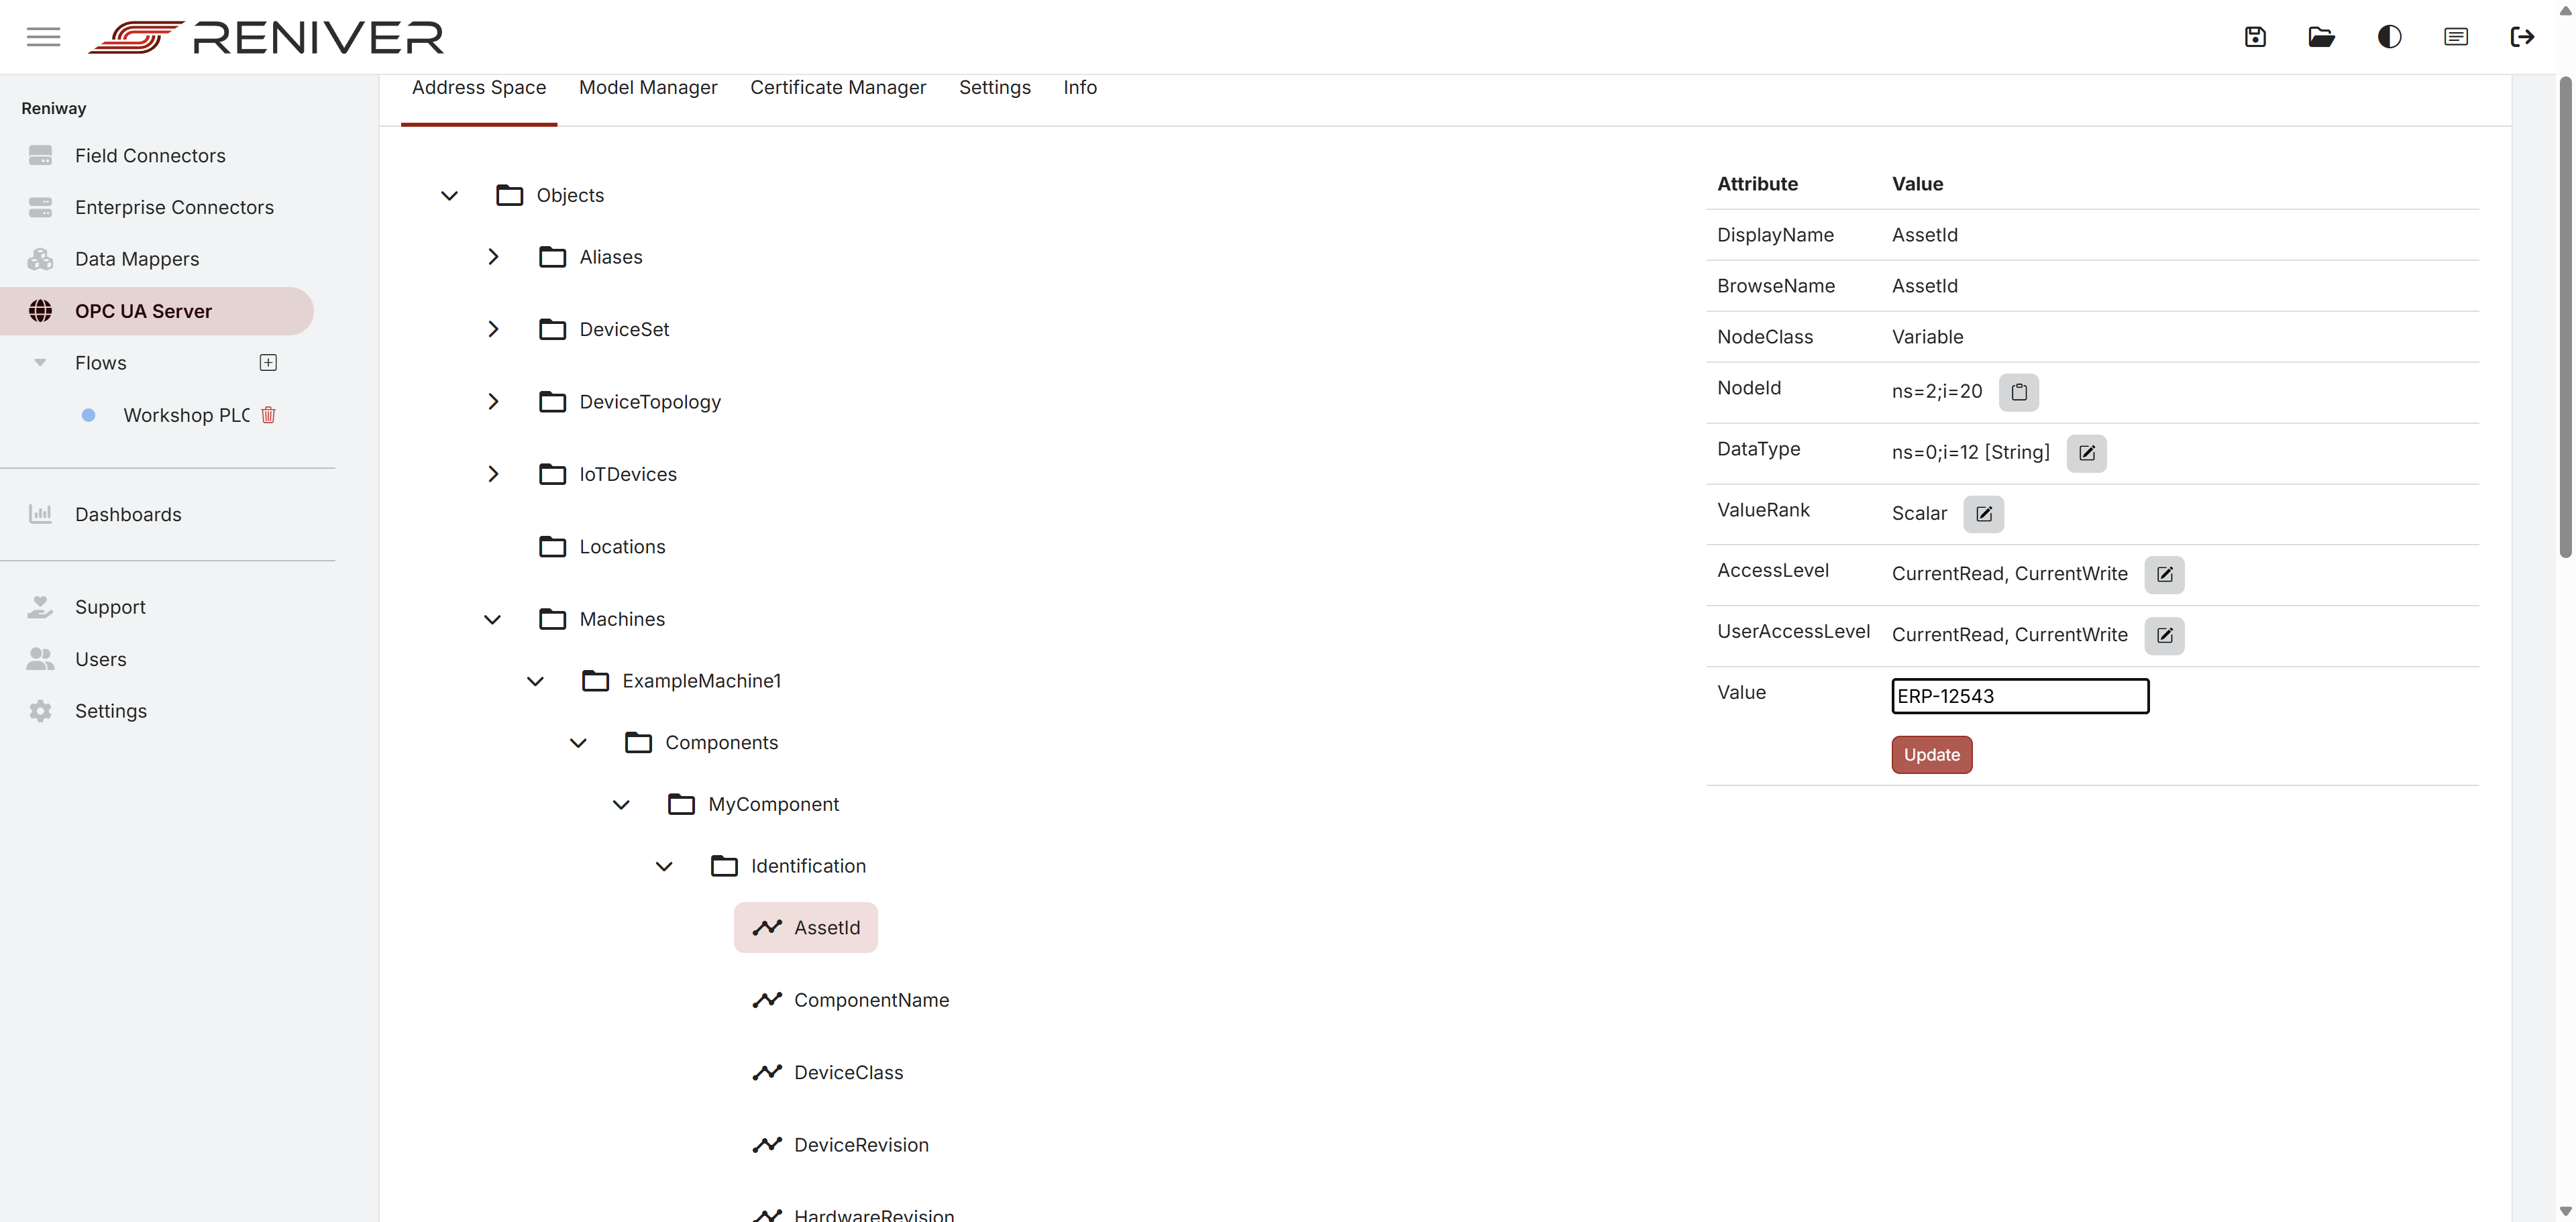
From the variable detail panel, you can:
- write a value to the variable
- update the datatype
- change the
ValueRank
That allows you to move variables between scalar and array-style forms and refine the model after importing it.
This is especially useful when a model needs project-specific adjustments before you start mapping live data into it.
Structured Datatypes
The server supports structured datatypes.
That means imported models can include richer OPC UA structures, and those structures can be represented in the server model instead of reducing everything to simple scalar values.
This is important for companion specifications such as Machinery and Umati, where object types and structured values are part of the model design.
Certificate Manager
The Certificate Manager tab is where you manage the OPC UA server certificates and the client certificates that connect to the server.
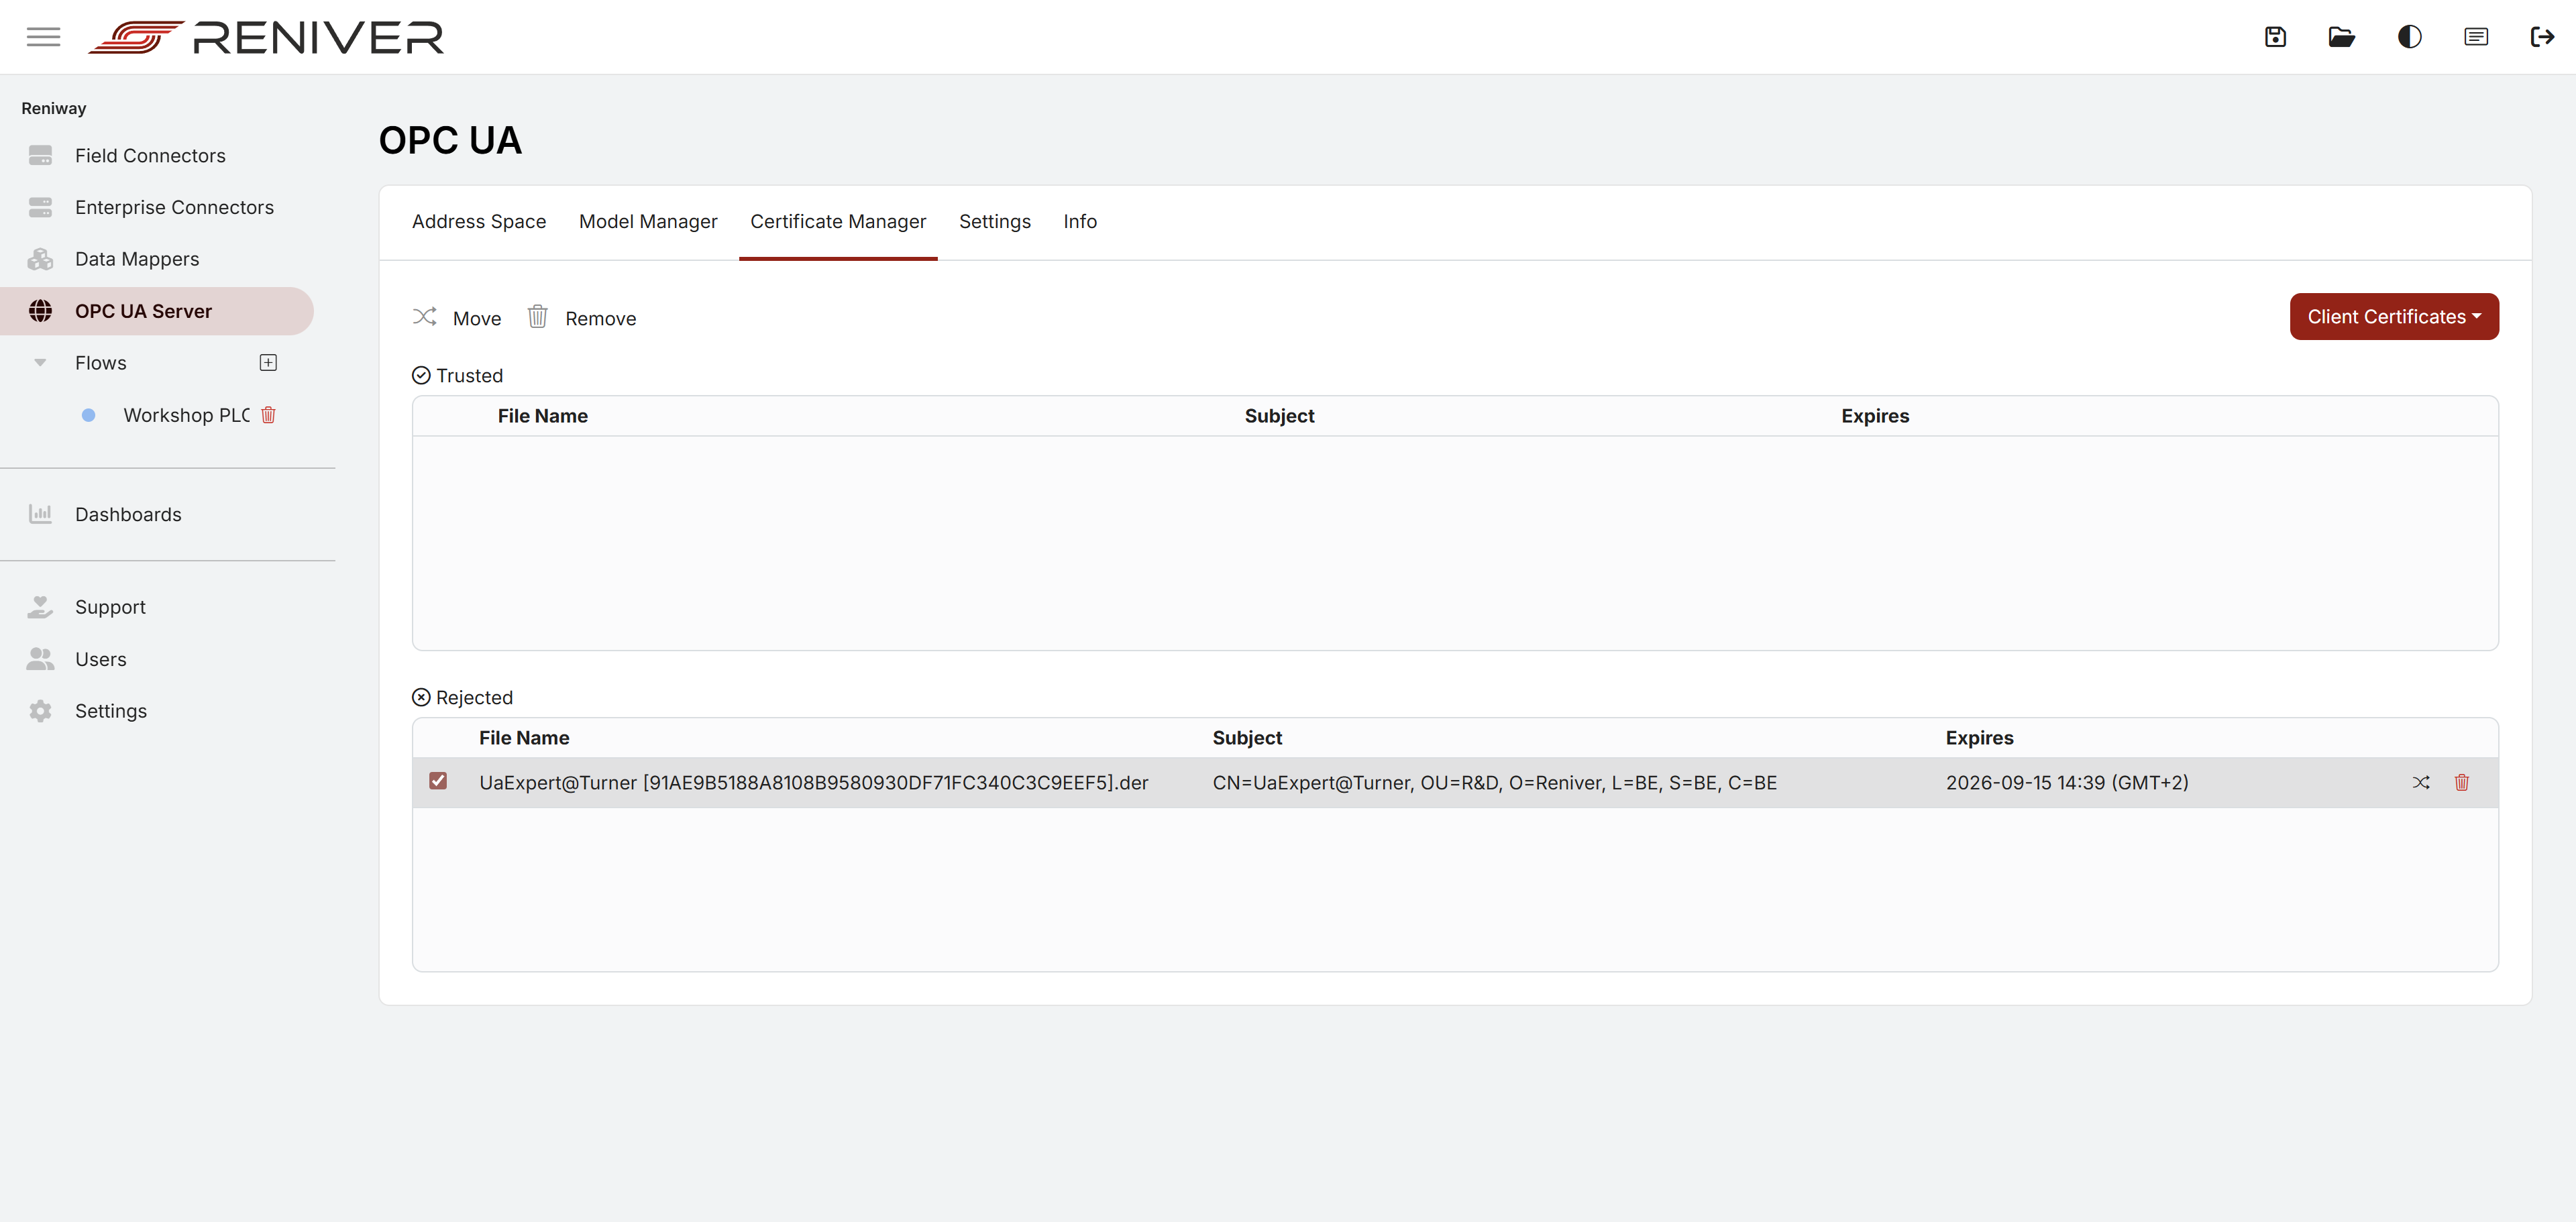
From here you can manage trusted and rejected client certificates and control which clients are allowed to connect.
This is the operational page you use when a client certificate must be reviewed, accepted, moved, or removed.
How This Fits with the Reniway OPC UA Server Connector
The workflow is:
- build or import the OPC UA server model on the
OPC UA Serverpage - create the required instances in the address space
- configure the Reniway OPC UA Server connector in a flow
- select the target nodes from the server address space in that connector
- map live values from connectors or data mappers into those OPC UA nodes
So in short:
- manage the server and model on the
OPC UA Serverpage - manage the mapped properties and live data links on the
Reniway OPC UA Server connector
Info
| Info | Description |
|---|---|
| Endpoint URL | URL of the OPC UA server. |
| Auto Accept Certificates | Allow the server to automatically accept certificates from clients. |
| Security Policy: None | Allow Security Policy: None in the OPC UA server. |