Evaluation VM with VirtualBox
Use the Reniway Edge evaluation VM to explore the platform on your local network without dedicated edge hardware. Reniver provides the evaluation as a VirtualBox appliance file (.ova) and a license ISO file that can be mounted inside the VM.
To request a 1-month unlimited evaluation license, license ISO, and VM download link, email info@reniver.eu.
Prerequisites
Before you start, make sure you have:
- Oracle VirtualBox installed on your computer. VirtualBox 7 or newer is recommended.
- At least 4 CPU cores available.
- At least 8 GB RAM available.
- At least 15 GB free disk space.
- Access to your local network.
- The Reniway Edge evaluation appliance file (
.ova). - The Reniway Edge evaluation license ISO file (
.iso).
Download the evaluation files
After your evaluation request is approved, you will receive the files needed for the VirtualBox evaluation environment:
- the Reniway Edge VirtualBox appliance file (
.ova) - the Reniway Edge evaluation license ISO file (
.iso)
Download both files to your computer. The .ova file is imported into VirtualBox. The .iso file is mounted in the VM so the license file can be selected from inside the VM during the first Reniway login.
Import the appliance
Open Oracle VirtualBox and select File > Import Appliance.
Select the downloaded .ova file.

Review the appliance settings. The evaluation VM is prepared with 4 CPUs and 8 GB RAM.
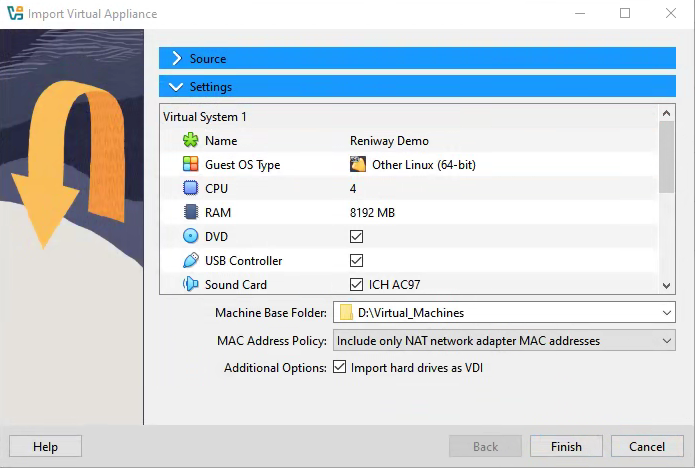
Click Finish to start the import. The import process starts automatically and can take several minutes, depending on your system performance and disk speed.
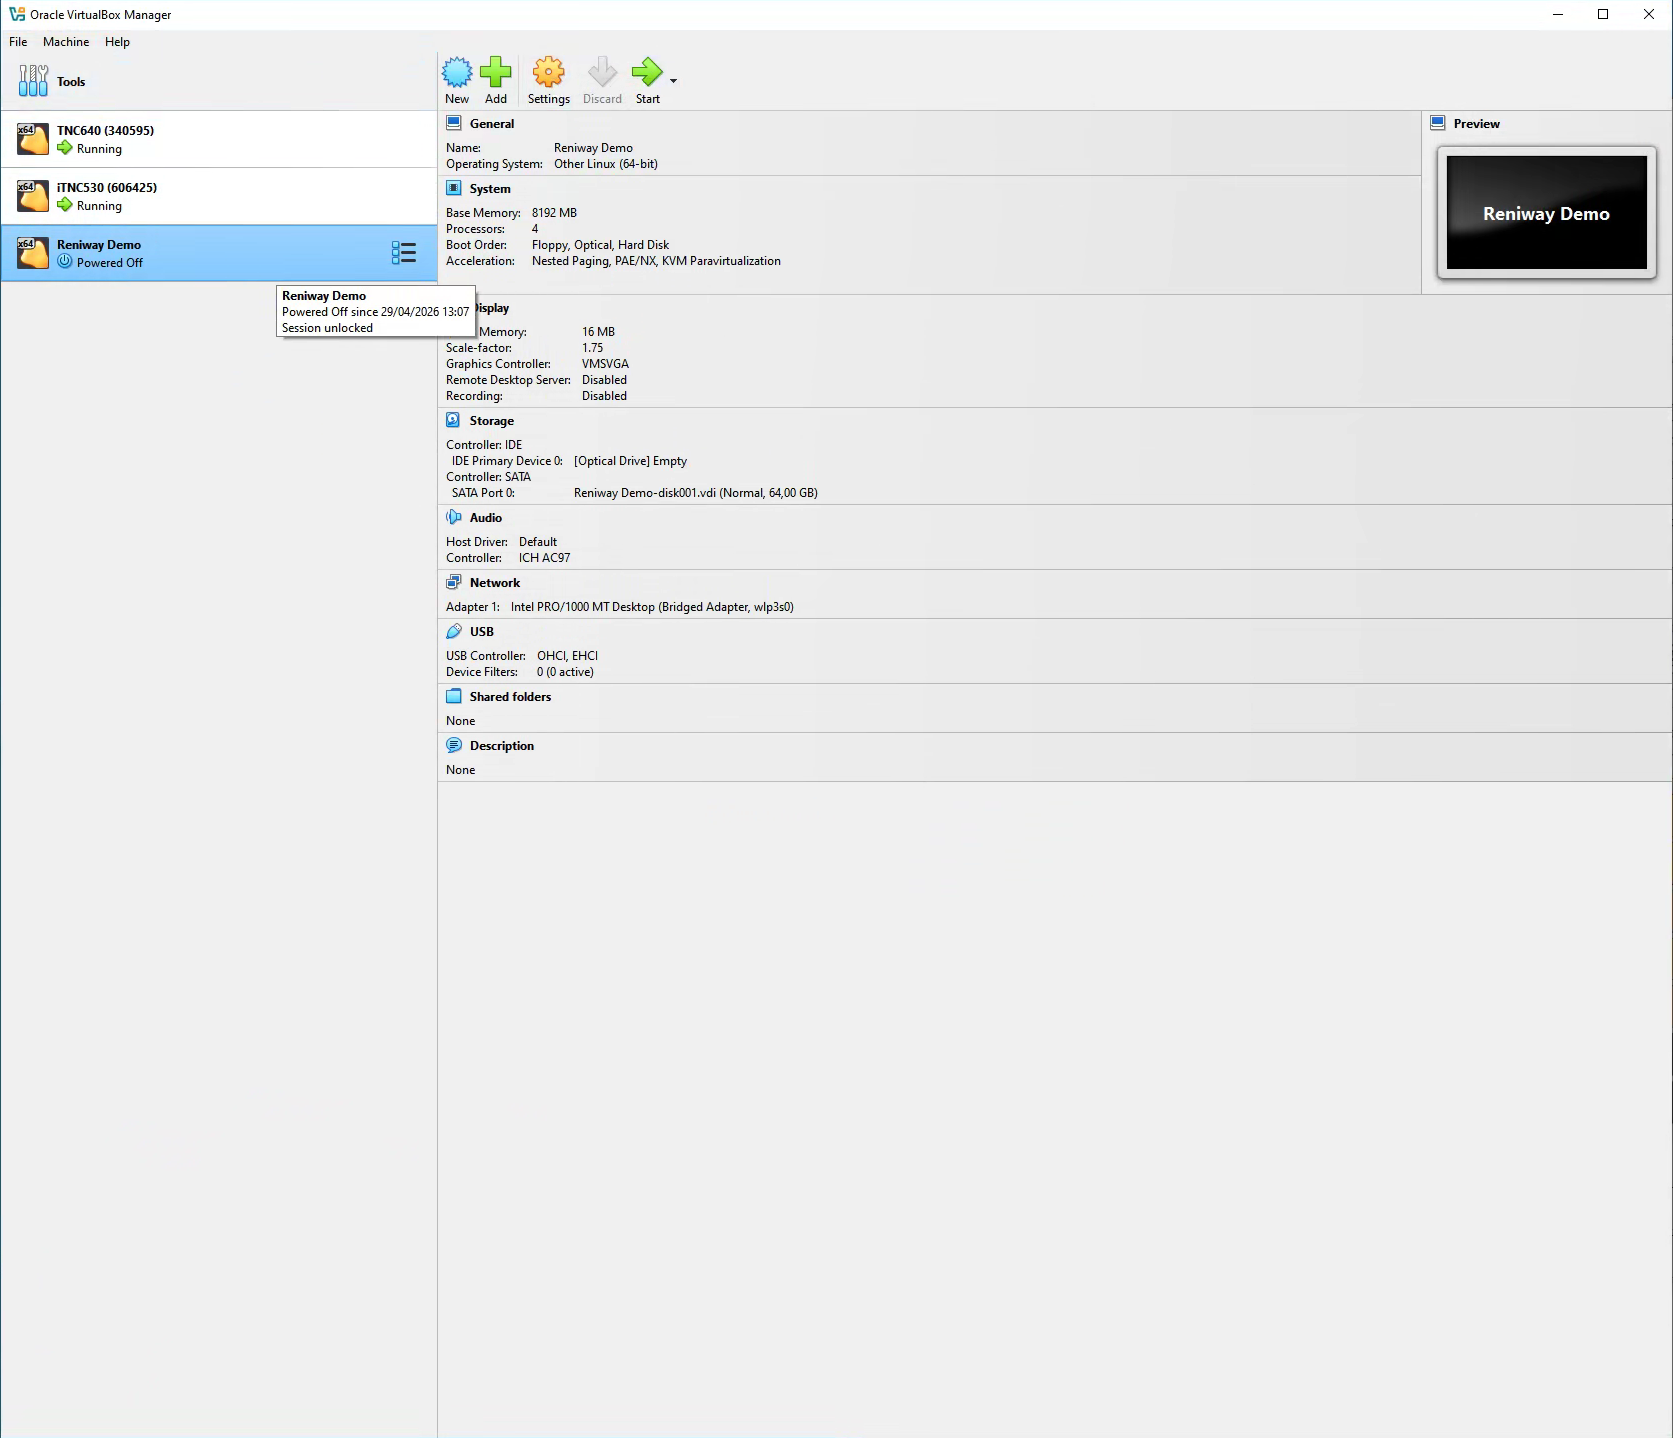
When the import is complete, the VM appears in VirtualBox.
Configure bridged networking
Before the first boot, configure the VM network adapter so Reniway Edge can communicate with devices on your local network.
- Select the imported VM.
- Open Settings > Network.
- Enable Adapter 1.
- Set Attached to to Bridged Adapter.
- Select the physical Ethernet or Wi-Fi adapter that is connected to your local network.
- Click OK.
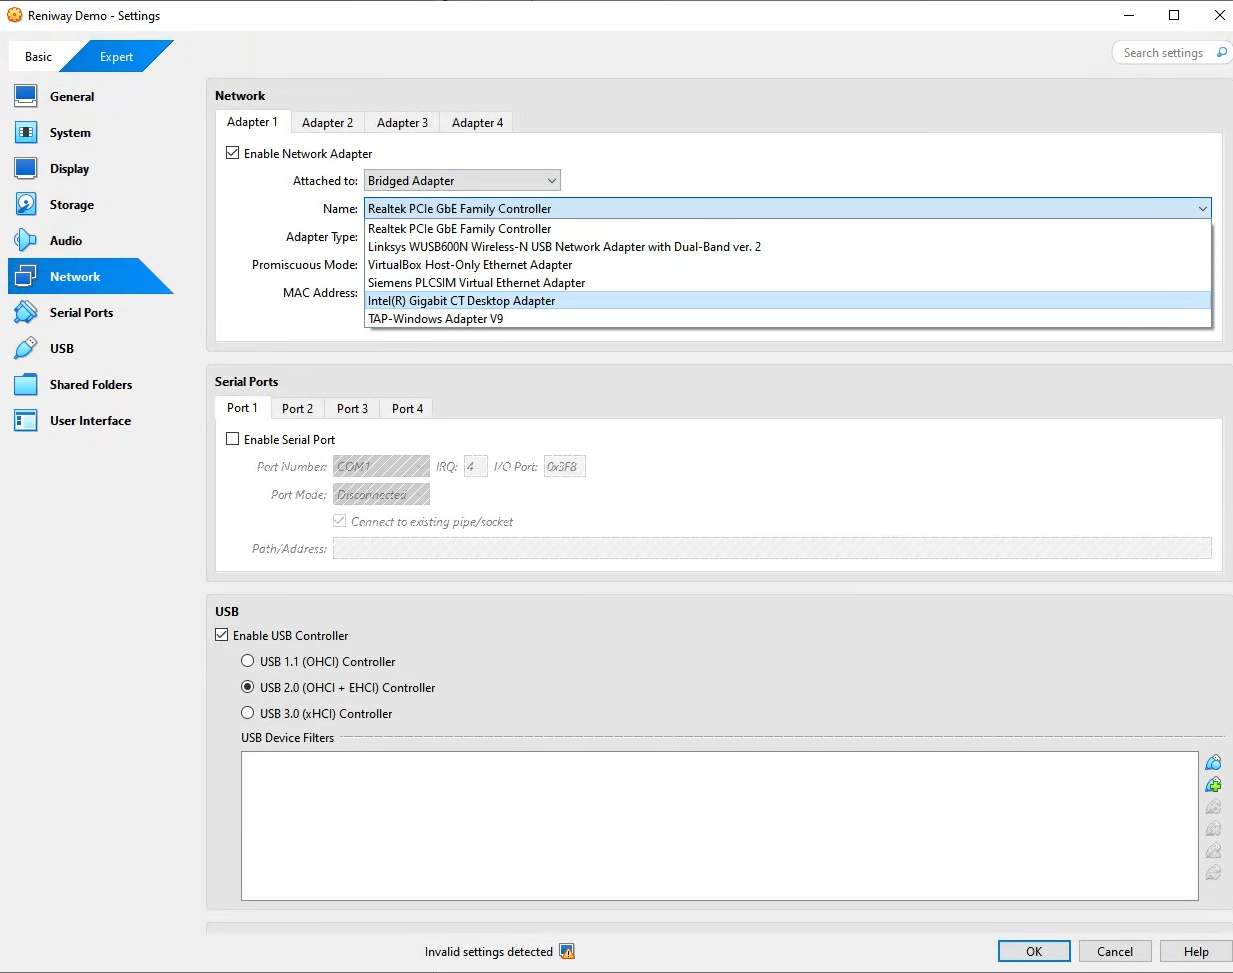
If your laptop has multiple network interfaces, choose the adapter that is connected to the same network as the devices you want to test with Reniway Edge.
Mount the license ISO
Before the first boot, attach the license ISO to the VM as a virtual optical disk.
- Select the imported VM.
- Open Settings > Storage.
- Select the empty optical drive under the storage controller.
- Click the disk icon next to Optical Drive.
- Choose Choose a disk file.
- Select the Reniway Edge evaluation license ISO (
.iso). - Click OK.
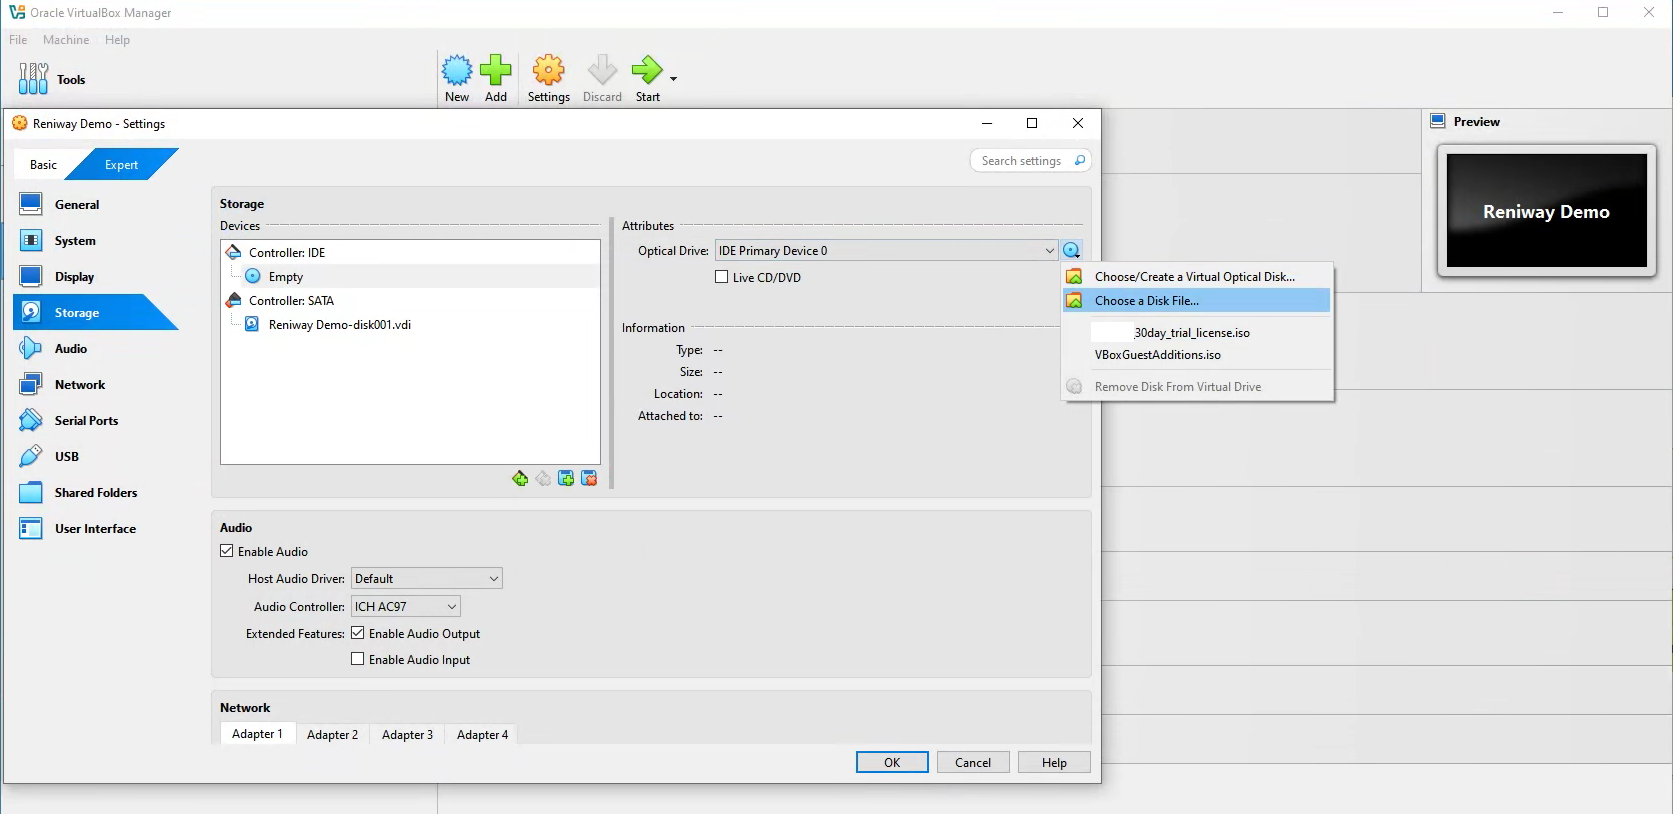
The ISO will appear as mounted media inside the VM after it starts. This makes the license file available to the browser running inside the VM.
Start the VM
Start the imported VM and wait until it has fully booted. If the desktop asks what to do with the mounted ISO, open it in the file manager or leave it mounted.
On the VM desktop, open the browser shortcut to the Reniway web application.
Import the license from the mounted ISO
The first time you open Reniway Edge, the web application asks for a valid license before the configuration interface becomes available.
- In the Reniway license upload screen, click Browse.
- In the file picker, open the mounted license ISO location, usually
cdrom. - Select the license file from the ISO.
- Click Upload License.
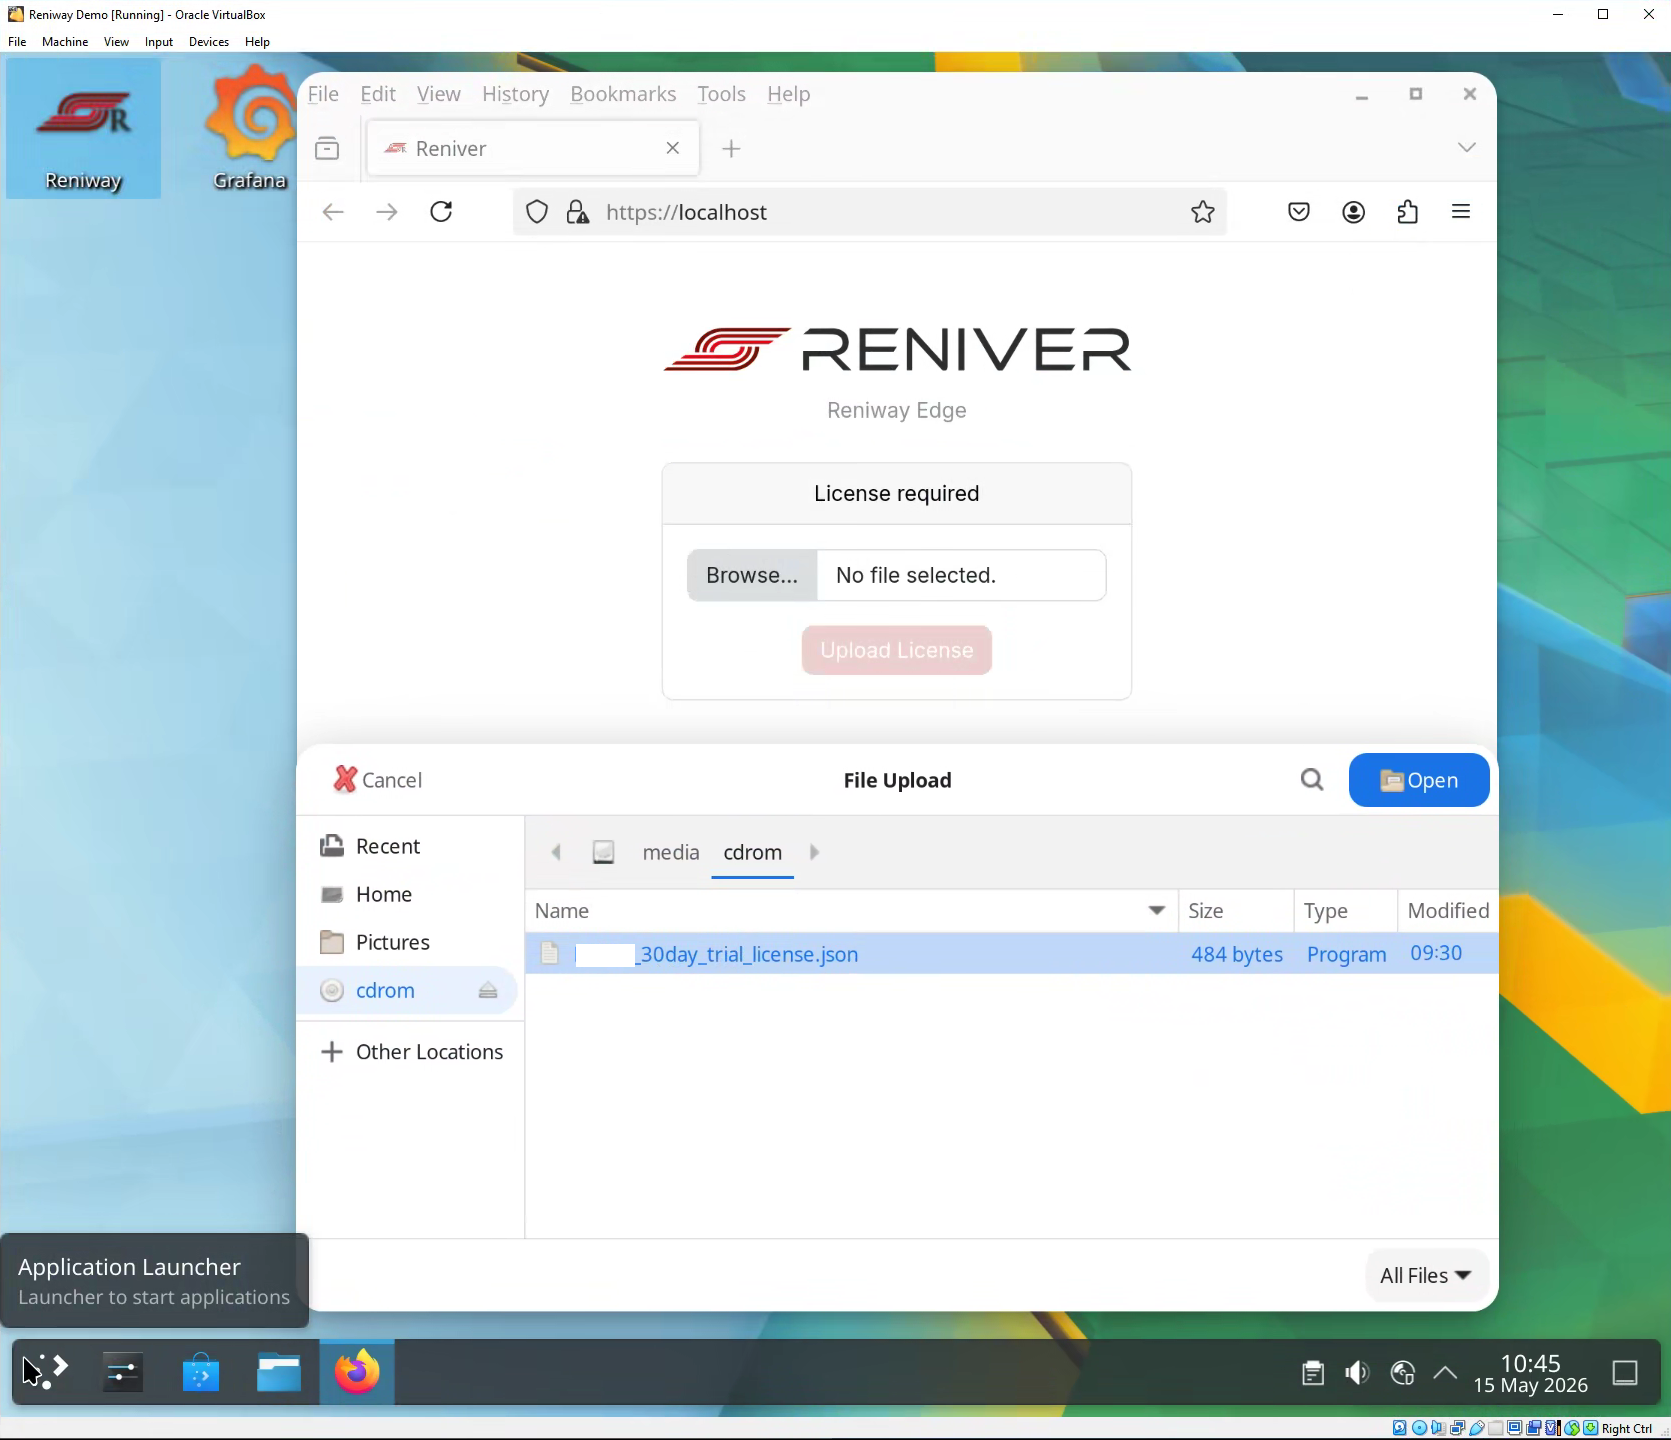
If the cdrom location is not available in the file picker, first open the file explorer from the folder icon in the taskbar and check that the CD-ROM is mounted. Then return to the browser and click Browse again.
If the license is valid, Reniway Edge unlocks the configuration interface.
For the detailed license upload flow, see First-time login and license upload.
Create the first user
After the license is accepted, create the first user account.
Keep the email address and password for this first user account in a safe place. If the credentials are lost, the easiest recovery method for the evaluation environment is to reimport the VM and repeat the first-time setup.
Configure the network interfaces
After you have imported the license and logged in, configure the VM network interfaces from the Reniway Edge web application.
- Open Settings > Host.
- Find the active network interface in the Network Interfaces table.
- Choose either DHCP or Static addressing:
- Use DHCP when your network should assign the IP address automatically.
- Use Static when your IT or OT network requires a fixed IP address.
- Apply the network configuration.
- Note down the IP address assigned to Reniway Edge.
You will need this IP address to access the Reniway Edge web application from your own browser later.
For example:
192.168.1.120
After the interface is configured, open the Reniway Edge web application from your own machine:
https://192.168.1.120
For host network settings, see Settings > Host.
Next steps
After the evaluation VM is running, continue with the documentation for the workflows you want to test:
- Machine connectivity and connectors
- OPC UA integration
- MQTT integration
- Data mappers
- Flows
- Project management
Troubleshooting
VM has no network access
Check that:
- Adapter 1 is enabled.
- The adapter is configured as Bridged Adapter.
- The selected physical network interface is connected to your local network.
- Your firewall allows VirtualBox network traffic.
Web application cannot be reached
Check that:
- The VM has received an IP address.
- Your laptop is on the same subnet as the VM.
- You are using
https://followed by the VM IP address. - The VM has fully finished booting.
License ISO is not visible in the VM
Check that:
- The ISO is attached in Settings > Storage.
- The VM was started after attaching the ISO.
- The mounted media is visible in the file manager.
- The browser file picker is looking in the mounted media location.
If needed, shut down the VM, reattach the ISO, and start the VM again.
License is missing or expired
If your evaluation license is missing, invalid, or expired, contact info@reniver.eu.